How to create a social media landing page on your Squarespace site
Are you guilty of using Linktree for your IG bio link??
🙋🏼♀️ Me too. I totally hopped on that bandwagon & still have a blog post on Linktree setup to prove it.
If ya wanna know why I switched & how to set up a new landing page on your Squarespace site, keep reading!
Why I switched from Linktree
Ultimately, there were 3 simple reasons:
Linktree was a landing page owned & operated by someone else/another company (which could disappear any time).
Linktree is styled by someone else (you have to upgrade to a paid plan to stylize your landing page & I didn’t want to do that).
Using Linktree meant people weren’t actually coming to my site from that bio link, UNLESS they clicked through from the Linktree landing page too, even thought they had already decided to click through from my IG bio. It meant extra work to get people to my site.
I created a landing page on my own website.
I decided to create a landing page of my own, styled to match my website & use that link in my IG bio. Kind of a this-is-what-you-get-all-at-a-glance kind of website page, specifically designed to look best on mobile view.
That way, upon clicking they already ARE on my website, which counts toward my traffic numbers + it’s easier for them to see what I’m all about because I can personalize it however I want.
And of course, you can do it too!
It’s super easy, so I’ll walk you through a basic setup!
How to setup your landing page on Squarespace
#1 Click the + icon in the ‘Not Linked’ section of your Pages menu
#2 Then select the regular page icon
#3 Give the page a title that makes sense for your navigation (example: S1862 Welcome)
#4 Select the “Blank” page layout
#5 Click “Start Editing” at the bottom
#6 Start adding elements to the page
Here’s where you can get creative! On mine I have:
buttons (directing traffic to popular pages)
Recent blog posts (using the Summary block)
Featured products in my shop (using the Summary block)
and some personality in the form of a goofy GIF & emojis on my buttons
Add whatever makes sense for you, BUT keep these 4 things in mind:
have at least 1 call to action (specifically to buy from or work with you)
include directions to your most popular stuff
keep the layout basic & clean for mobile viewing (& check it on mobile to make sure it looks good)
keep your MOST important stuff at the top!
Here’s my landing page, for an example.

Mobile view

Tablet view
#7 Edit the URL for your new landing page!
Don’t forget to go back & edit the URL slug for your new page! To get there, go to your Pages menu, scroll through all your Not Linked pages, where you created it. Once you find it, click the gear icon that shows up when you hover over that page title.
There will be a Settings popup, find where it says URL Slug near the top, and edit that text there.
Squarespace doesn’t like URL slugs less than 2 letters so I was forced to use “hey” instead of “hi” (which would’ve been more normal for me, but whatevs).
Whatever you choose keep it short, logical & easy to remember!
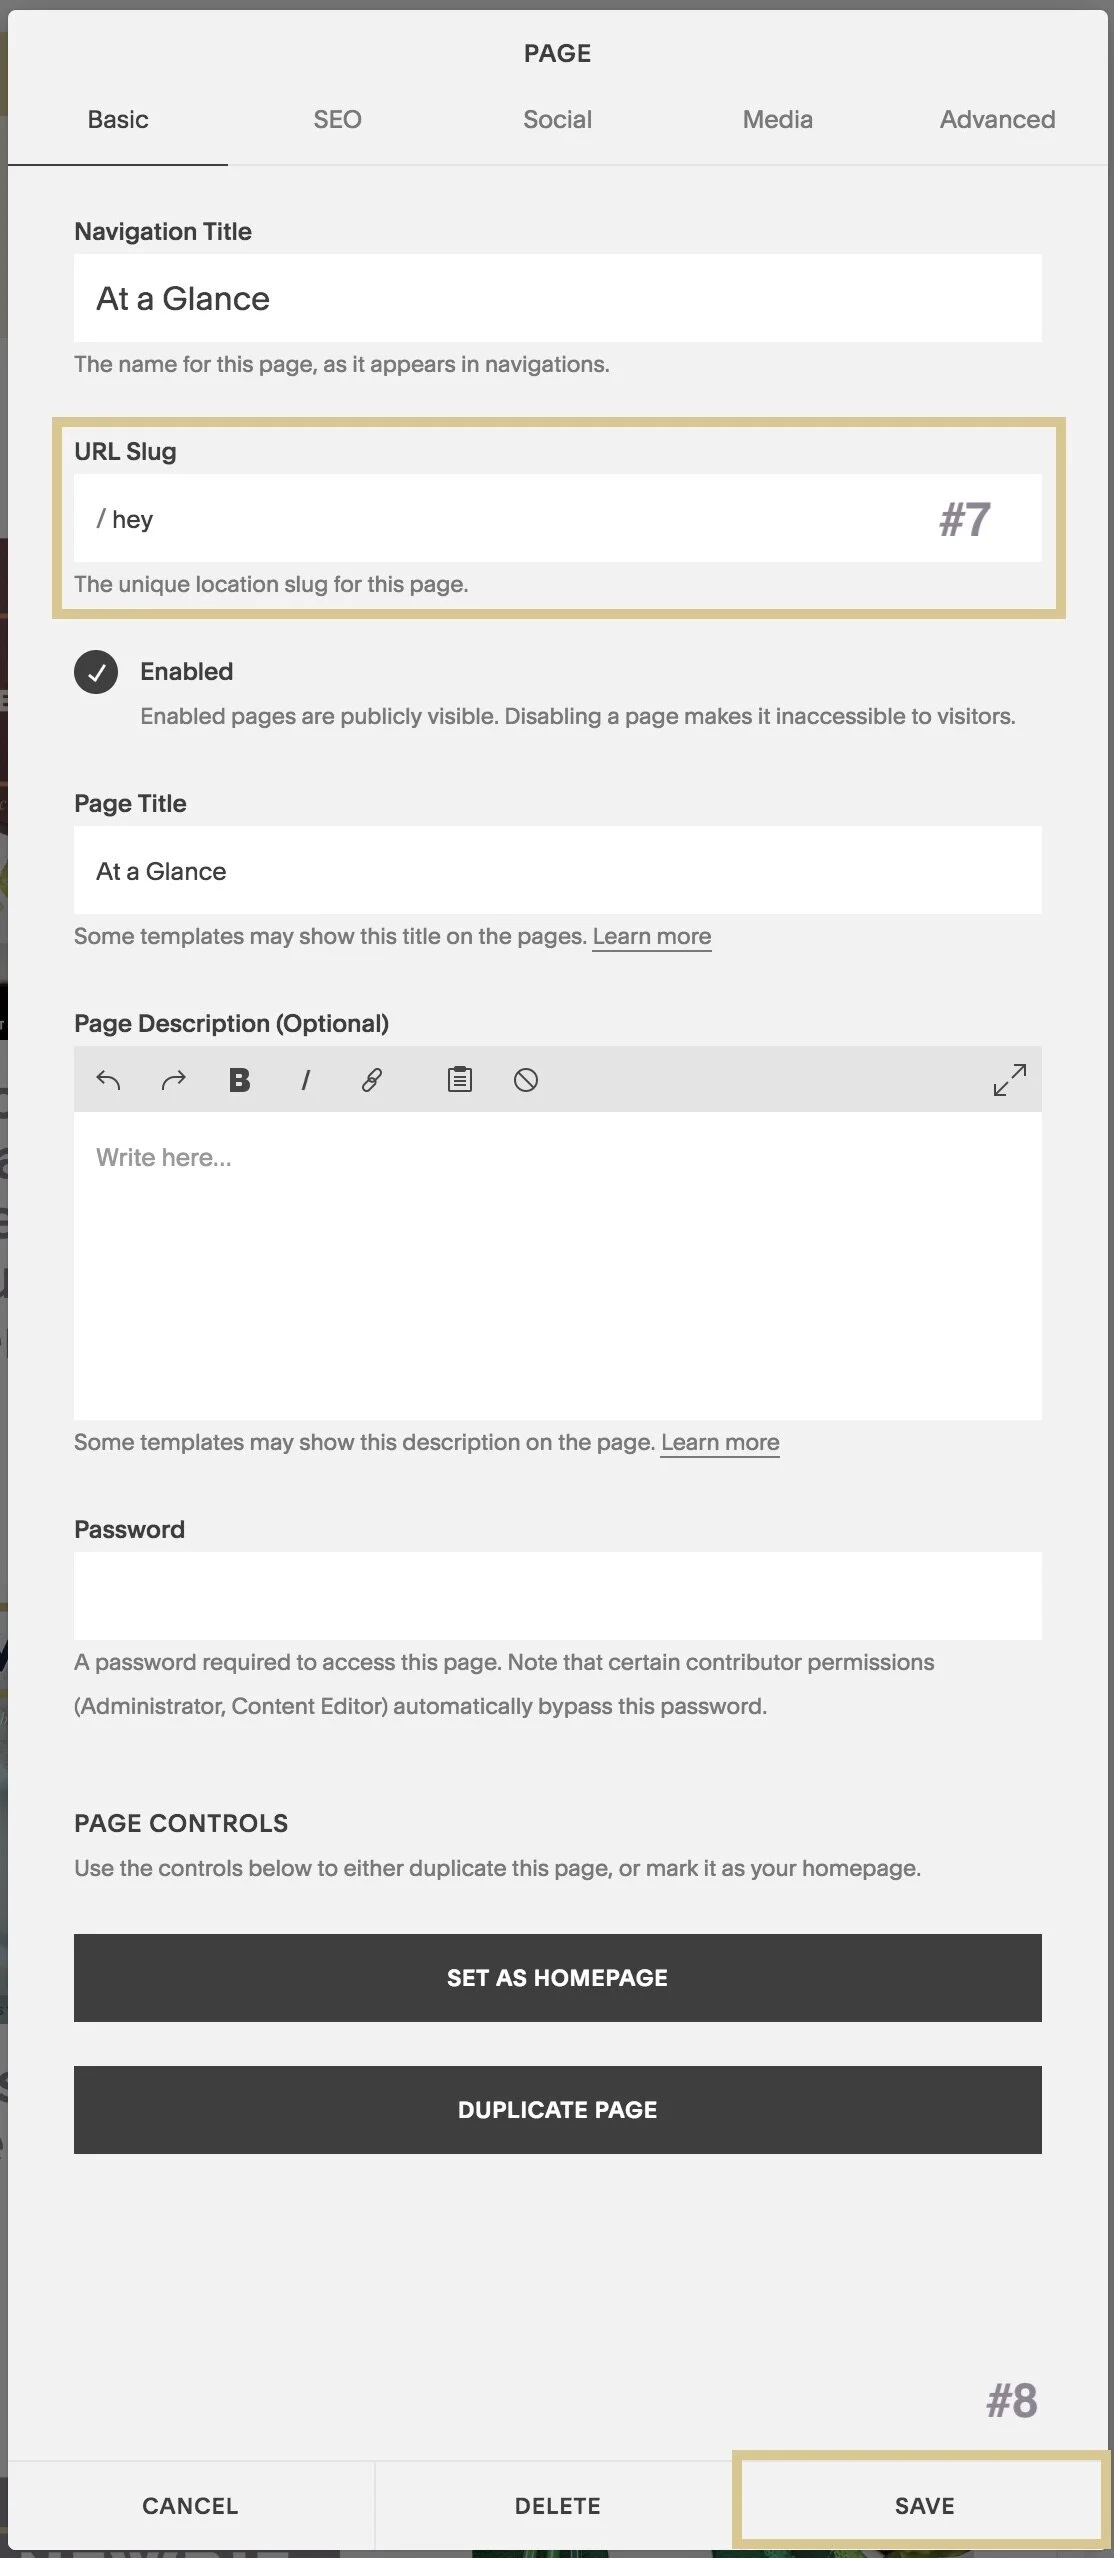
#8 Click Save
You’re done! Your new page is LIVE!
#9 Add your new page to any/all of your social media pages!
Now go add that URL to your Insta bio or your Pinterest/Facebook/YouTube/Twitter/LinkedIn profile in your website link spot.
Whoever clicks on it, will be redirected to your own website, on this new landing page you created! It will help increase your site traffic by not having to redirect people through Linktree, keep viewers on YOUR site, it will match your own branding (since it’s already part of your site), and you own it so you control how it looks & works. How ‘bout them apples? 😂
TIP:
In case you aren’t sure how to figure out what your WHOLE URL slug is, it’ll be your custom domain
www.yourdomain.com + /(whatever you put as your new URL slug in the page settings from Step #7!)So mine would be: www.studio1862.com/hey
With those simple steps you can have your own “mobile landing page” right on your site, styled to match your branding and your personality. No upgrades to style it, no fear of losing it (unless of course you shut down your site or delete that page from it).